Showing posts with label A bit of everything.... Show all posts

Wednesday, 8 August 2012

It never stops...

What never stops, you ask? Well, let's put it this way. It is early August. As a teacher, my reaction to back-to-school flyers and commercials is palpable. My stomach turns, my eye starts to twitch, and worst of all that vein in my temple starts to pulsate. Don't get me wrong, I really love my career, but geez... can't we all just relax for the full two months?

And sadly, as much as this is the case, I'm guilty of the perpetual moving hamster wheel. What I mean is, I'm always thinking about school. I was beyond thrilled in July when on holidays at the lake, I went into a new dollar store and scored some super cool new classroom decor for a steal. I was really excited when a box arrived on my doorstep from Long & McQuade containing all the music my students will perform this year.  This morning I spent a good couple of hours planning and prepping a new fun bulletin board for back to school (I'm thinking a huge painted Mr. Incredible with comic book star bursts saying "Music is Incredible"... got to find ways to appeal to boys particularly- what better way than through a superhero?) This is all proof positive that teaching is not a 10 month of the year, 9 a.m. to 3 p.m. job. I challenge anyone who thinks that way to come hang out for a while.

I have to admit, the artistic/creative part of teaching elementary music (make no mistake, I'm a high school teacher by training and find it so much more instinctual for me), is one of the things I love the most. I've discovered how visual smaller children are. They respond so well to bright, beautiful spaces. I've learned they are more likely to take risks in an inviting space. I've learned that they love those things which are tactile and manipulatable. All these tools are not simply a matter of interior design, they really do go a long way to ensure that their learning is play based. The kids tend to forget that they are learning. Actually, when it comes right down to it, I'm sure high school students would respond well to this also, I just never seemed to have time for such things like that between festivals and musicals and concerts and trips and... and... and...

This week I've also devoted at least 10 hours crafting for school purposes. My friend Lisa came over for Stitch n' Bitch night. It had been a stretch of rather hot weather. You know, the kind of weather that is suffocating, and thus zaps you of all reasonable intelligence and energy.  I had intended to get cracking on a rather wonderful lunch bucket for the boys. The pattern is a beauty, and seemed simple enough. But when Lisa arrived and I set out to do it, I stood there staring at the instructions with a glazed over look on my face. They may as well have been instructions for assembling Ikea furniture. I could not for the life of me figure out what to do. Sometimes you got to know when to hold 'em, know when to fold 'em, know when to walk away, know when to run. I walked away. But, one cannot waste an ever precious stitch n' bitch night, productivity was still required. I pulled out my enormous stash of felt and got working on a craft that is brainless, but time consuming.

One thing I've loved using with my kindergarten and grade 1 students has been felt songs and stories. They love them. I have no idea why more so than anything else, but they all delight in these things.  I had my dad make me a large framed board, Ethan painted it for me and I used spray adhesive to cover one side with craft felt (yep, it is a family sweat shop that I run). Periodically I will cut out the pieces for a song or story that I use in class. My collection was small: I had done Brown Bear, Brown Bear by Bill Martin, Five Green and Speckled Frogs (Raffi's version), Five Little Pumpkins Sitting on a Gate (Raffi again) and Must be Santa (good old Raffi gets a lot of love in my classroom).

Felt stories are super easy to make. Simply cut the shapes out of felt and you're done. And don't get me wrong, everyone knows I'm not artistic. With the world at our fingertips it is easy to find clip art and graphics that are easy to replicate. I like to add the details with fabric paint, and sometimes googly eyes or pom poms. Over the last few days I've added 5 felt sets to my small collection. I like to use felt bits for cumulative songs or stories (you know, ones that have lists in them ie... ho ho ho, cherry nose, cap on head, suit that's red, special night, beard that's white) or counting songs where you sing the same thing several times (ie. Five little... any number of things from pumpkins to frogs, to monkeys).

True to form, my own kids loved the sets I made. If I was a nice mum, I'd make a board for at home and some sets here, they'd love that. But it is time consuming, and I'm nothing if not too lazy to do the same thing twice. But one could very easily make a good at home version. An Ikea poster picture frame without glass would work nicely. Or a travel version on a small cookie sheet (oooh.... and that way one side could be a magnet board too!) would be fun too. If you have small kids, guaranteed this would be a hit. Or what a fun birthday gift- with the pieces in a fun little drawstring bag?! Endless possibilities with this project.

Here's the final tally of my work this week:
1) Chicka chicka Boom Boom (by Bill Martin)


2) Slippery fish (Charlotte Diamond)


3) There Was an Old Lady Who Swallowed a Fly


4) A Hunting We Will Go


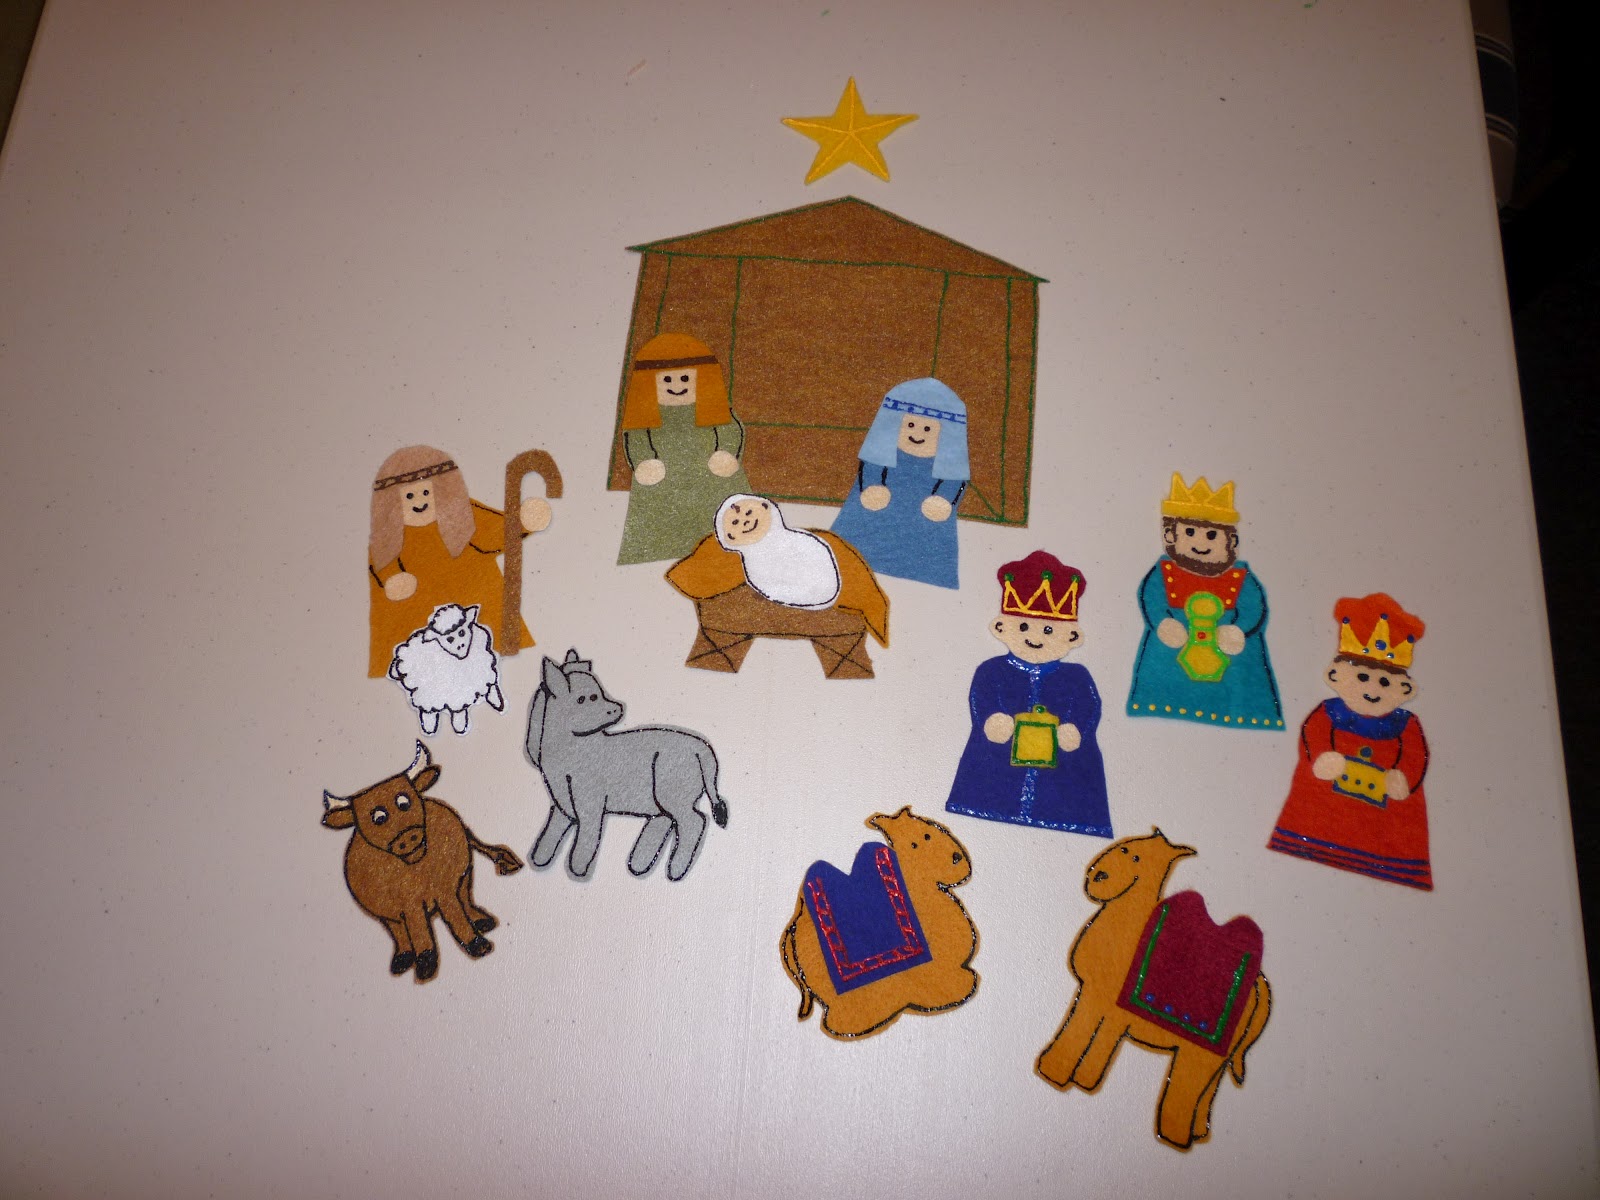
5) Nativity set (to be used with Raffi's There Was a Little Baby)


One website I've come across which had a bazillion template sets was www.makinglearningfun.com.

And after 10 hours of cutting and painting, suffice it to say I won't be doing any more felt stuff for a while. Albeit satisfying and cute, it is rather mind numbing too.

September is inevitable isn't it. And there is something to be said for routine. But tomorrow, I'm going to read a book.

Happy trails!

PS: My garlic is ready- woohoo! I do so love to garden...


Monday, 13 February 2012

Happy Valentine's Day!

Well. It's that time of year again. I have to say, I really dislike Valentine's Day. So much fuss over nothing it seems. If you want to show someone you love them, why wait until an annual day? It's like you are filling a yearly quota in one shot. That's cheating. If you really love someone, show them all year long. I really think that the loads of laundry Ethan throws in without me asking him to, or the dirty diapers he voluntarily changes because he knows I loathe doing that mean so much more to me than any silly card, or candy, or flowers. Somehow, flowers mean more on January 10th, or March 30th, because they arrive out of the blue, than the customary contrived demonstrations of affection that are endorsed by all major retailers at this time of year.

I will say however, that Valentine's day is very fun if you are a kid. I used to love cutting out my valentines (remember how you used to have to cut them out yourself- why did the technology of perforation take so long to invent??) . We'd decorate a paper bag and tape it on our desk and by the end of the day, it would be full of valentines (not a single cartoon character among them) with funny little puns- like a picture of a train that said "Valentine, I choo-choo- chooose you! Inevitably, my mum would have a little surprise for us- I remember little containers of cinnamon hearts, and one year a little adorable pin with a cute mouse and hearts on it. I love that. Small surprises, what are better than small surprises? I'm pretty sure that I still have that little brooch- I loved it so much and the memory was so sweet, I couldn't bring myself to part with it.

So now that I have kids, stock in Valentine's Day has gone up a lot here in recent years. The first thing on the Valentine's agenda this weekend was bringing dessert to Canasta Night. I'm embarrassed to confess I've never made brownies from scratch before. Never. Always from a box. Horrendous. Turns out they're the easiest thing in the world to make and it only takes 1 bowl (HURRAY!!! I hate cleaning all the junk you need when you are baking). So, it was decided Brownies was the dessert. Once out of the oven, I cut them into heart shapes. I served them with caramel sauce (yummmmm....) and vanilla ice cream. What a hit! Everyone loved them- big and little. Elio is busy these days asking for a "Chawlie Bwown" every five minutes. What a guy. The recipe? I used my go to for any standard recipe, the Betty Crocker Cookbook. Here it is:

Chocolate Brownies
5 oz. unsweetened baking chocolate cut into pieces
2/3 cup butter or margarine
1 3/4 cups sugar
2 teaspoon vanilla
3 large eggs
1 cup flour
1 cup chopped walnuts
1. Heat oven to 350 F. Grease bottom and sides of 9x9 inch square baking pan with shortening.
2. In 1 quart saucepan, melt butter and chocolate over low heat, stirring constantly. Cool 5 minutes.
3. In medium bowl, beat sugar, vanilla, eggs with electric mixer on high speed, 5 min. Beat in chocolate mixture on low speed, scraping bowl as you go. Beat in flour until just  blended. Stir in walnuts and spread in pan. Bake 40-45 min, until sides pull away from the pan. Cool completely on wire rack about 2 hours.

This is the recipe for the caramel sauce (can't remember where I dug this up. I use this all the time for bread pudding.

1/2 cup butter
1 cup light brown sugar
1/4 teaspoon salt
1/2 cup evaporated milk

In a saucepan over medium heat, melt butter and brown sugar. Bring to a boil and remove from heat. Stir in salt, vanilla and milk

It worked really nicely to put the sauce in a squeeze bottle and drizzle it on that way. Looks high class- takes minimal effort. My kind of dessert!

Next on the list was to get a treat together for the kids at daycare. This one was a fun one to do with Matteo. I found the idea on the Family Fun website: http://familyfun.go.com/crafts/butterfly-bounty-841052/
First we decorated each snack bag with a heart sticker.


Next, we had to fill snack sized ziplocs half full with your snack of choice (teddy bear graham crackers here):


Next, we painted wooden clothes pins with glitter glue. Painting is fun. Glitter is gross. What can you do?
To finish things off, we made antennae from silver pipe cleaners. I always knew Matteo was from Mars.

Once the paint dried, I glue gunned google eyes and the antennae on, and drew on a mouth. Here's the finished product- super fun right?


And finally. I was looking for a wee project to do for the boys. They are nuts about stuffed animals. They are the most played with things in our house, bar none. Some how I decided that they needed owls. A good many hours was devoted to web searches for downloadable patterns. And there were a good many. But Goldilocks over here was not satisfied... this one is too big, this one is too small, this one is too silly etc. So I got out a piece of paper and started drawing. I came up with something that looked reasonable to me, and decided to make my own pattern. Here's what I started with.

From this drawing I traced out individual pattern pieces. I cut them out as one does. The body of the owl and the heart shaped face of the owl, as well as the wings are done in a cotton. Scraps will do here- he's not a huge guy. The eyes, widow's peak, beak, belly hearts and feet are done in felt. I used felt against my better judgement. It looks super cute, but isn't terribly washable- which is a quality in children's play things that I value very highly (especially after this morning's mess, which I will not describe, but suffice it to say, NOT PRETTY).


The first thing I did was fuse the body together. I began with the heart shaped face. Using Wonder Under (I think that's what, it's called- fusible webbing, available at any fabric store), I ironed the webbing on to the piece, peeled back the paper, then ironed the part on to the body of the owl.


Once I fused this first piece, I appliqued it in place. I chose to use a satin stitch. Usually I wouldn't as it tends to ripple the piece, but it worked ok this time, and since it is a stuffed item, I figured the stuffing would eliminate any ripples.


From here, I fused the rest of the bits in place all together. Hint, if you are using felt, put a press cloth over top of it when you iron, so that the felt is not on the bottom of your iron. It tends to shrink and stick if you don't and that gets a bit messy. Next, I appliqued all the bits in place. I used a very narrow satin stitch for the small bits, and a wider satin stitch for the larger bits.


My initial intention was to sew up the feet and stuff them. But they are small and finicky, and I'm very lazy. So I just cut two feet from felt, and sewed them together to make them a bit thicker, and they are fine. You could certainly stuff them- that would be really cute, but tricky given the small size.  Don't look too closely... it's folk art right? Haha.


Next I placed the feet on the body, and pinned the back of the bird on- right sides together. I sewed them up leaving an opening for stuffing about where the wing would be (so the wing can hide my ugly hand stitch up job. I've discovered that snuggling is a dangerous sport for stuffies- they take a licking. So in order to prevent future surgery jobs, I stitched "in the ditch", on top of my original stitch line to add strength. This is also helpful as I like toys that are rather firmly stuffed, so there is pressure on the seams.


Mr. Owl was then turned about and ready to stuff. Before I stuffed, I made his wings. Each side of Mr. Owl has two wings- one in the main colour (on top) and one in the contrast colour (on bottom). The top wing is lined in felt for a bit of substance. It is also top stitched. I found it helpful to clip the felt lower at the top than the outside pieces, and cut the corners at a diagonal. This made it much easier to finish and turn the top edge under. 


I sewed up the bottom wings in the contrast colour, turned them and top stitched them also. Once all these bits were done, I machine sewed the bottom wing to the top wing. This allowed me to hand sew through only one "wing" when attaching them to the owl:


And once that was done, and he was stuffed, about midnight last night, I had a new friend- he's such a hoot:


And because my kids see nothing ridiculous about fighting over two identical items, each owl has a heart appliqued on his hiney that now, after this photo was taken, has each boy's name in fabric paint. I have to say, that for my first attempt at making up a pattern, I'm feeling just a bit pleased with myself. It was smooth sailing, and he's the perfect size. He's a gratifying hug indeed (I put beanie pellets in his keister too so he's got some good weight to him). Granted, he's a bit lumpy and thick around the middle, but then so I am. I think he'll be a hit. I hope he will anyways!

Should anyone want a go at this project, let me know- I would be happy to pass along the pattern, but can't figure out how to attach a downloadable pdf file to this blog. If you'd like it, leave me a comment and I will email it to you.

And despite all my grumping about Valentine's Day, I'm sorry I didn't get on the band wagon sooner. I've seen a couple other little projects that look easy and fun that I would like to try. Ah well, there's always next year. 

Happy trails!