You know how sometimes something seems like a good idea, but really when push comes to shove, not so much? Somehow, this weekend I decided I needed to try flooding cookies. See, Matteo has his party at preschool and I rushed in to sign up for food (gotta get the cookies or cupcakes category... seriously, no one wants to be stuck with sandwiches). About three times a year I make some form of rolled cookies. I am my mother's daughter (although her vocabulary is much too expansive to lower herself to using this word), in that I hate that which is "poop-dinky". What's that you ask?
From our family dictionary:
poop-dinking: verb to muck about with piddly project which requires patience and are really more effort than they are worth; piddling around with something which is not a priority at the moment and could be done at a later moment.
adjective: poop-dinky
My mum is a fantastic baker, and the house never lacked for yummy baked goodies, but rolled cookies were not something we had. My mum didn't like rolling and cutting and decorating. Too labour intensive. My thoughts exactly. But, despite that, I still love the look of them, and more than that, I love the look on my kids' faces when they get ready to dig in. They are seriously excited by the fun shapes. I've always admired beautifully flooded cookies. For those of you not familiar with the term, flooding is the technique that is used to completely cover the top of a cookie in thin, hard icing. The preschool party seemed to be the perfect excuse to give this a go. Right?
Here's the thing. A double batch of flooded sugar cookies requires the following:
1) Mix the dough
2) Refrigerate a couple hours
3) Roll the darn things out
4) Bake them
5) Cool them
6) Outline them in royal icing
7) Flood them
8) Finish off the details in royal icing.
Masochism. There is no other word for the entire day I spent doing this (with a two hour break during which I went out the farm to help my sister tackle her pond department). This might be a fun thing to do for a special occasion, but I wouldn't recommend it when baking for the masses. It dawned on me at about 9:30 pm, while I was smack dab in the middle of flooding that, let's be honest, these kids eat paste and crayons. What do they care about the time put into these things? That being said, here's how it went:
1) I started by baking a double batch of sugar cookies. Not my favourite, but kids like them and they work well to decorate. I like the Betty Crocker Cookbook for these basic recipes- they are no fail, really.
If you are like me, completely uptight about most things, than no doubt you share my frustration with rolling cookies- the need for excess flour which powders over a nice finished product, the perpetual sticking etc. I have discovered some things to help this. I always roll the dough onto a very large cutting board that I cover in parchment paper (taped down on the underside so it stays put). Under this board goes a silicone mat that allows me to put pressure on the rolling pin without sliding the cutting board around on the counter. I LIGHTLY flour the parchment, and use saran wrap over the dough, under my rolling pin. This eliminates the need to flour the rolling pin, keeping the top of the cookies pristine and not floury.
 2) Next, I made royal icing (thanks Martha Stewart for your recipe!), and outlined each cookie with a thin plain piping tip. Here's a nifty trick I've found somewhere online (source forgotten I'm afraid) for filling a piping bag with ZERO mess. It is amazing! Pull a nice amount of saran wrap and lay it on the counter. Scoop your icing into it. Fold the saran over the icing forming a log of sorts. Grasping each loose end of the saran log, swing it in circles, closing the icing in the log (see photos). Next cut one end of the log twist and place into the icing bag. NEAT AND TIDY. So great, perhaps even life changing. It's true. I don't get out much.
Twist ends, by swinging it in circles in front of your body.

Cut one end, and....

Voila! So very smart. Wish I had thought of it.
3) Next each cookie was outlined in royal icing

4) Have you ever used Wilton's website? Lots of good resources there if you care to practice masochism yourself. That was where I found a recipe for Poured Cookie icing. The trick here is to ensure it is liquid enough to spread. This icing uses corn syrup which makes it dry shiny. Rather pretty. I used a squirt bottle and squirted a bunch of icing on the cookie. The youtube videos I consulted recommended using a toothpick to spread the icing. I quickly abandoned this as it was too time consuming in favour of an icing knife/spatula thing that I use when I decorate cakes. Much faster. Spread the icing out being careful not to push it over the outline.
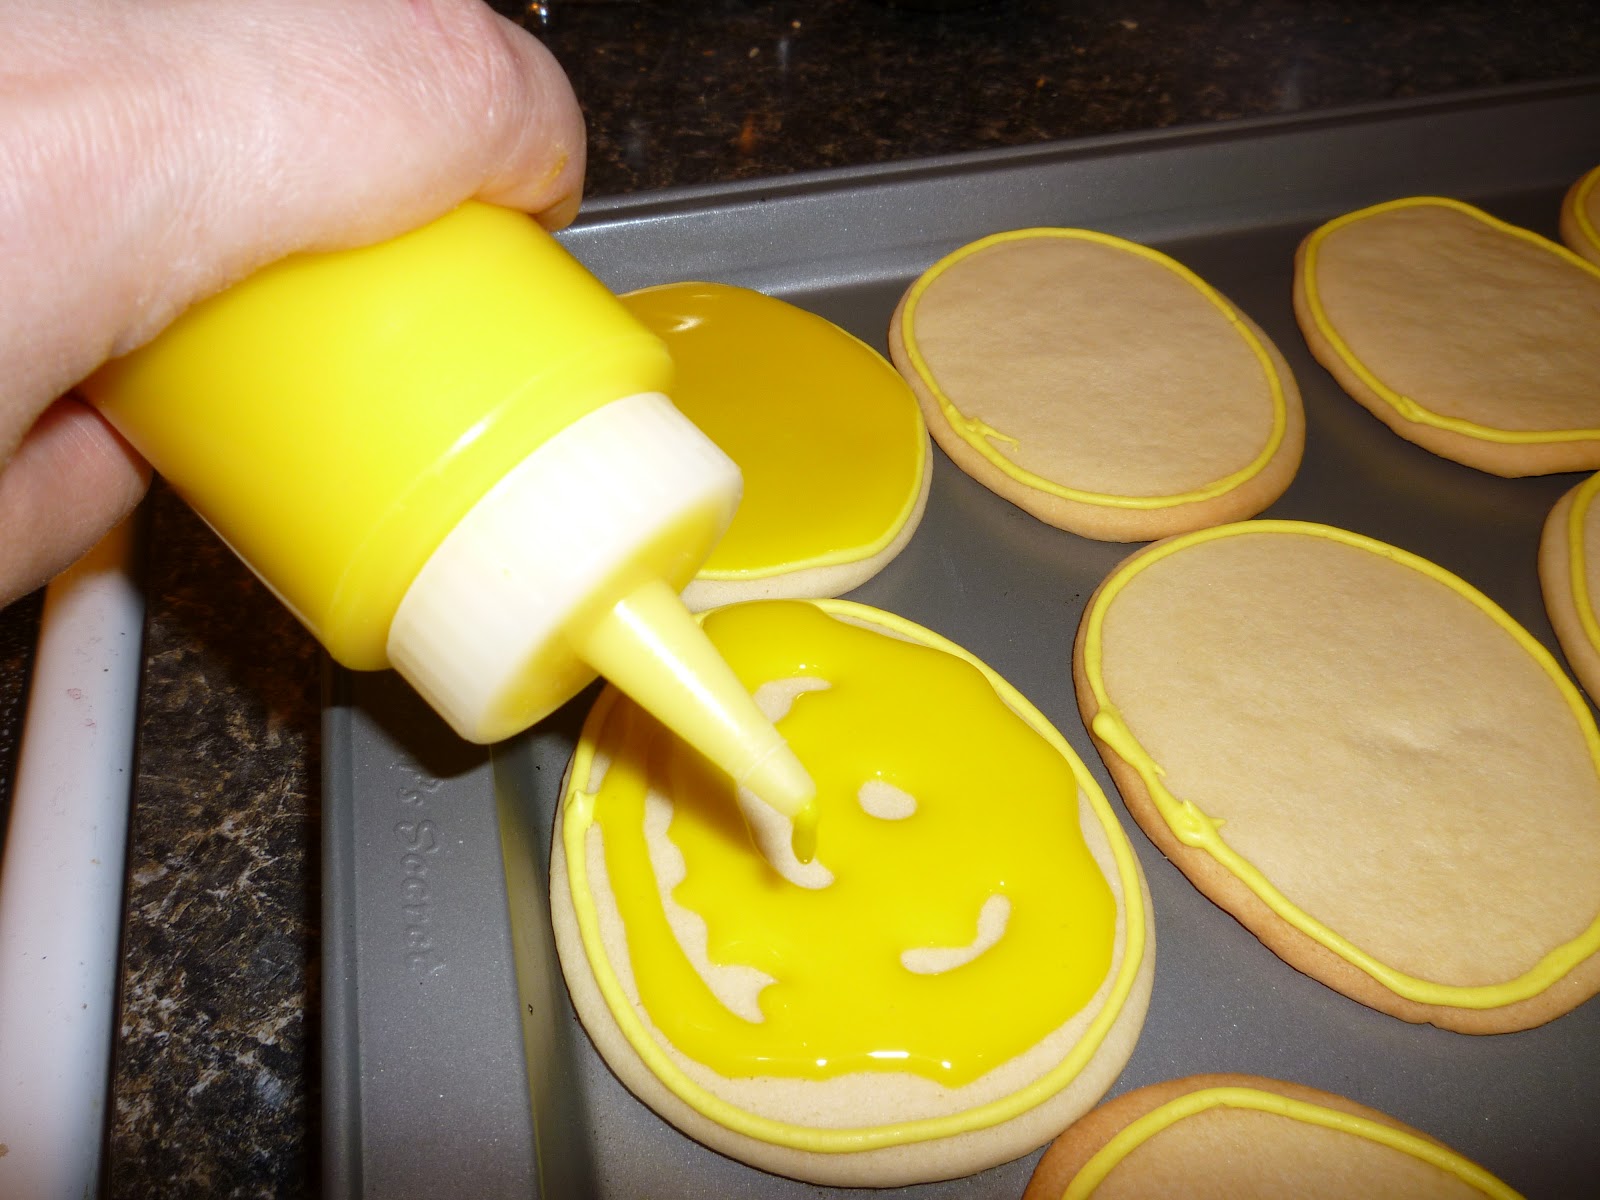

5) Once the flooding was done, easy but time consuming, I finished off the details with royal icing and chocolate chip eyes. Here's the result:


So in the final analysis, if this is on your bucket list, it is easy. But why take up valuable bucket list space with something like this? I've done it, and am happy that it was so easy. I think it would be an adorable birthday party favour- one for each kid wrapped in pretty cellophane bags or something, but I'm in no rush to repeat the mass order. That being said, Matteo didn't disappoint when I showed him this morning... his eyes certainly lit up. Love that.
Happy trails! And Happy Easter!
No comments:
Post a Comment