Thursday, 3 May 2012

Alter-Egos... what we wish we were


I'm back. Where have I been? Well, New Orleans for one. !!!! Best trip ever- hands down. What an incredible place! That was a couple of weeks ago. Since then, I've been LAZY. With a capital everything. Maybe it is the rain (hello? Um... Mother Nature? I don't mean to be critical, but the saying is "April showers bring May FLOWERS," not "April Showers bring even more rain in May." Sigh. I suppose that's what you get for living in a rainforest climate. Whatever the reason, I've been finding motivation and time hard to come by.

But really, what is more motivating for someone who is "thrifty" (like my euphemism for cheap?) than a school supply list? See, Matteo is beginning kindergarten. I'm not sure when or how that happened, but it did. So we begin getting ready for school.

(Insert old lady voice here) Back in the day when I was in elementary school, you were sent a list of every item you needed for the year, from kleenex to pencil crayons. Now however, at least at Matteo's school, you get a list of cheques you need to write. One of these is for the bulk of his school supplies. They order them and deal with them right at school now. I have to say, that seems to take some of the fun out of it... what was more exciting in late August than laying out all your new gear for school and labelling it all? However, I have stupidly ventured into Staples in August, and have seen what that is like, so probably from a mother's perspective this is a much more appealing method of purchasing supplies. The school did, however send a list of additional items that each child needs that can either be purchased from them, or brought on one's own. On that list was a gym bag. $15 for a gym bag?? Or was it $10? I can't remember now, but I thought it was outrageous. My husband clearly must be rubbing off on me. He goes down in infamy in our house for having, when our toilet was causing us issues, responded to my suggestion that we should call a plumber with "What? Pay a plumber $75 an hour to scratch his keister?... I'm not paying someone to scratch their keister, I can scratch my own keister for free!!". He was 27 at the time. It was a shocking glimpse into our senior years for me. And he didn't really say keister. He said something else which only made him sound more curmudgeonly.

Anyways, I decided that I could make a gym bag for less, and it would be cooler than the standard issue. When I was a kid my mum made me a gym bag too. It had an appliqued running shoe on it with laces that actually tied. The only thing I liked about gym was that bag. Off Matteo and I went to the fabric store to pick something out. He immediately chose hideous Toy Story fabric which was so bright an obnoxious it could induce a seizure. I immediately used my power of veto. It was $16.98 a metre. Defeats the purpose. But I did have to come up with a suitable, even more fun, alternative. Matteo thinks he's Batman. For a while there, when I asked him what he want to be when he grew up, he responded with "Batman". So another thought occurred to me. We settled instead for some PLAIN and cheap broadcloth, and a promise we could make this a cool Batman bag if I made him a Bat patch for it.

Here's how it went:
 First I found a colouring page (online of course) with the Batman emblem on it. I cut that out of yellow and black broadcloth and fused it together using paper-backed fusible webbing. Matteo was impressed and sold as soon as he saw this- forget the rest of the bag. I managed to convince him that his favourite colour (brown) was a really yucky choice for bag colour, so he humoured me and chose green (Kermit green to be exact), his second favourite colour.
I used a newspaper page as my size template and cut out 4 pieces for the bag (two for the outside, two for the lining). I fused the emblem onto one of those pieces (the front of the outside).
 Next I appliqued around it. It looks ok and is necessary to prevent it peeling off or fraying. I really wish satin stitch didn't ripple, because I know I'd be happier with the look of that, but it does ripple, so this blanket-like applique stitch is the better choice.
 I cut two tabs of gros-grain ribbon about 2 inches long. Each was folded in half and sewn (zigzag for strength) on the open edge. I place these about an inch or so up from the bottom of the bag on either side.
 I sewed the bag up on the sides and bottom, reversing several times over where I was sewing the tabs in the seams. The tabs will take some strain as this is where the straps of the bag will be attached, and I really didn't want them to pull out or fray.
 Here is the outside of the bag sewn up. Next job was to sew the lining in the same way I did for the outside, but this time, leaving a 2 inch opening on the bottom edge (you will pull the back right side out through this hole). I turned the outside of the bag right side out (as in the picture), and I left the lining inside out. I inserted the outside bag, inside the lining matching the raw top edge. Make sure the right sides are facing or you will have a date with your stitch ripper (ask me how I know that... go on, ask me...). Sew through both the lining and the outside bag on the top edge.
 Pull the whole thing through the opening you left. Then hand sew the opening closed. Now, push the lining into place so you've got a lined bag. Next I ironed the thing. On each side of the bag, about half an inch from the top, I made a button hole. This will be where the strings come out. I did this rather than leaving slits in the bag top, it seemed simpler to me.
 Next I made a casing on top side (front and back) on the inside by sewing on wide gros-grain ribbon along both the top and bottom edges.


 Finally, I cut two lengths of cording about 58 inches long each. I fed one through both casings from the right side, with loose ends coming out the right side buttonhole, and one from the left side, with its loose ends coming out the left buttonhole. Each side's loose ends were tide to the corresponding tab, creating a little drawstring back pack. The cording unfortunately frays like crazy, and isn't meltable, so I had to use clear nail polish to sort of seal the raw edge.
All that you do is pull each sides cords and it gathers shut. It is now waiting for some smelly little gym clothes to carry.


Voila! A bag fit for Batman (and his strange little sidekick Dish Towel Boy).


We are one step closer to being Kindergarten ready. I suppose the next step will be buying his uniform in June. As much as I hate that time flies so darned fast, it is pretty exciting all the same.

Happy Trails!

Monday, 2 April 2012

Flooding cookies... an exercise in masochism


 You know how sometimes something seems like a good idea, but really when push comes to shove, not so much? Somehow, this weekend I decided I needed to try flooding cookies. See, Matteo has his party at preschool and I rushed in to sign up for food (gotta get the cookies or cupcakes category... seriously, no one wants to be stuck with sandwiches). About three times a year I make some form of rolled cookies. I am my mother's daughter (although her vocabulary is much too expansive to lower herself to using this word), in that I hate that which is "poop-dinky". What's that you ask?

From our family dictionary:
poop-dinking: verb to muck about with piddly project which requires patience and are really more effort than they are worth; piddling around with something which is not a priority at the moment and could be done at a later moment.
adjective: poop-dinky

My mum is a fantastic baker, and the house never lacked for yummy baked goodies, but rolled cookies were not something we had. My mum didn't like rolling and cutting and decorating. Too labour intensive. My thoughts exactly. But, despite that, I still love the look of them, and more than that, I love the look on my kids' faces when they get ready to dig in. They are seriously excited by the fun shapes. I've always admired beautifully flooded cookies. For those of you not familiar with the term, flooding is the technique that is used to completely cover the top of a cookie in thin, hard icing. The preschool party seemed to be the perfect excuse to give this a go. Right?

Here's the thing. A double batch of flooded sugar cookies requires the following:
1) Mix the dough
2) Refrigerate a couple hours
3) Roll the darn things out
4) Bake them
5) Cool them
6) Outline them in royal icing
7) Flood them
8) Finish off the details in royal icing.

Masochism. There is no other word for the entire day I spent doing this (with a two hour break during which I went out the farm to help my sister tackle her pond department). This might be a fun thing to do for a special occasion, but I wouldn't recommend it when baking for the masses. It dawned on me at about 9:30 pm, while I was smack dab in the middle of flooding that, let's be honest, these kids eat paste and crayons. What do they care about the time put into these things? That being said, here's how it went:

1) I started by baking a double batch of sugar cookies. Not my favourite, but kids like them and they work well to decorate. I like the Betty Crocker Cookbook for these basic recipes- they are no fail, really.
If you are like me, completely uptight about most things, than no doubt you share my frustration with rolling cookies- the need for excess flour which powders over a nice finished product, the perpetual sticking etc. I have discovered some things to help this. I always roll the dough onto a very large cutting board that I cover in parchment paper (taped down on the underside so it stays put). Under this board goes a silicone mat that allows me to put pressure on the rolling pin without sliding the cutting board around on the counter. I LIGHTLY flour the parchment, and use saran wrap over the dough, under my rolling pin. This eliminates the need to flour the rolling pin, keeping the top of the cookies pristine and not floury.

2) Next, I made royal icing (thanks Martha Stewart for your recipe!), and outlined each cookie with a thin plain piping tip. Here's a nifty trick I've found somewhere online (source forgotten I'm afraid) for filling a piping bag with ZERO mess. It is amazing! Pull a nice amount of saran wrap and lay it on the counter. Scoop your icing into it. Fold the saran over the icing forming a log of sorts. Grasping each loose end of the saran log, swing it in circles, closing the icing in the log (see photos). Next cut one end of the log twist and place into the icing bag. NEAT AND TIDY. So great, perhaps even life changing. It's true. I don't get out much.


Twist ends, by swinging it in circles in front of your body.


Cut one end, and....


Voila! So very smart. Wish I had thought of it.

3) Next each cookie was outlined in royal icing

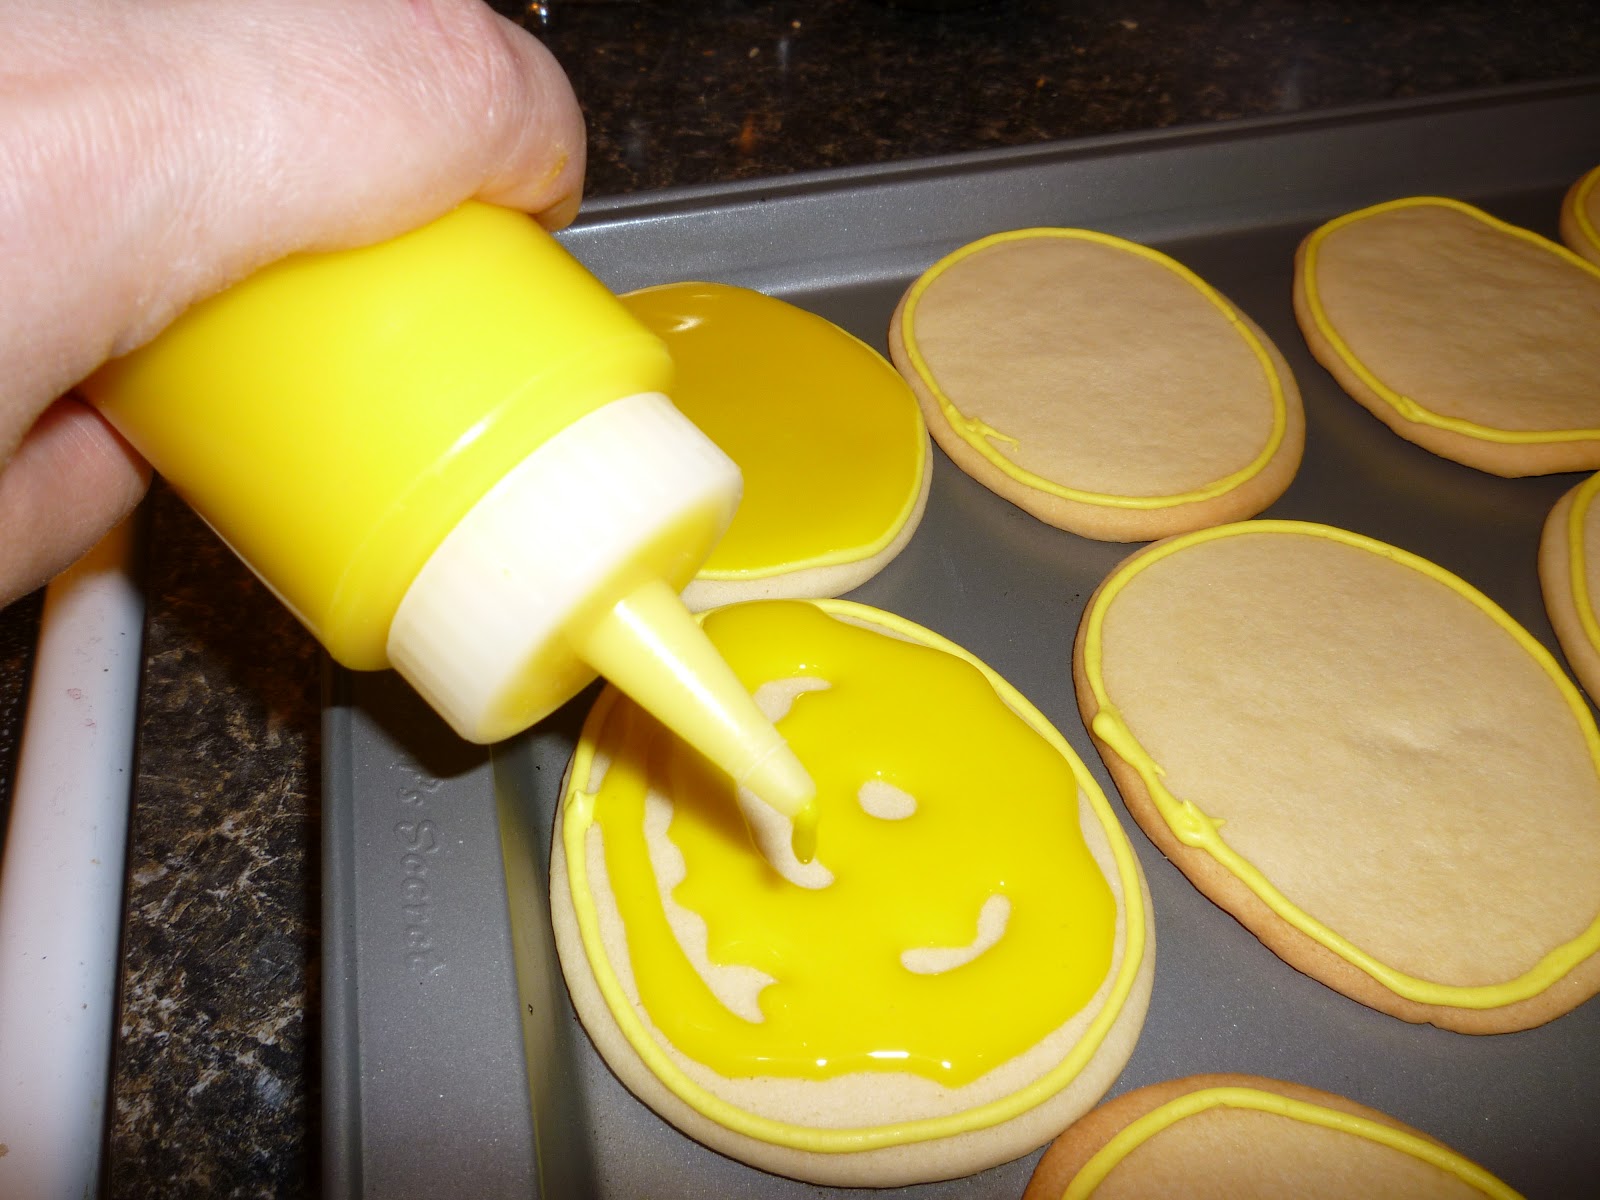
4) Have you ever used Wilton's website? Lots of good resources there if you care to practice masochism yourself. That was where I found a recipe for Poured Cookie icing. The trick here is to ensure it is liquid enough to spread. This icing uses corn syrup which makes it dry shiny. Rather pretty. I used a squirt bottle and squirted a bunch of icing on the cookie. The youtube videos I consulted recommended using a toothpick to spread the icing. I quickly abandoned this as it was too time consuming in favour of an icing knife/spatula thing that I use when I decorate cakes. Much faster. Spread the icing out being careful not to push it over the outline.


5) Once the flooding was done, easy but time consuming, I finished off the details with royal icing and chocolate chip eyes. Here's the result:


So in the final analysis, if this is on your bucket list, it is easy. But why take up valuable bucket list space with something like this? I've done it, and am happy that it was so easy. I think it would be an adorable birthday party favour- one for each kid wrapped in pretty cellophane bags or something, but I'm in no rush to repeat the mass order. That being said, Matteo didn't disappoint when I showed him this morning... his eyes certainly lit up. Love that. 

Happy trails! And Happy Easter!


Sunday, 1 April 2012

Easter bunny's on his way...


Easter has always been one of my favourite holidays. There's always something to do. My cousins always came for a visit and my aunt and nonna would set up a little Easter egg hunt in the house- such fun after 40 days of Lenten sacrifice with no sweets. I didn't even like the eggs, but somehow hunting for them made them taste better. Also, there were always fun things happening in the kitchen and sewing rooms. My mom made us a new dress each year without fail. New shoes were had (oh... light pink patent leather Mary Janes... what could be better?). She be busy making treats- chocolate covered nougat eggs, sweet breads, a million different things really. Nonna would always twist her beautiful bread dough into the shape of doves, with little raisin eyes. You just knew it was something special.

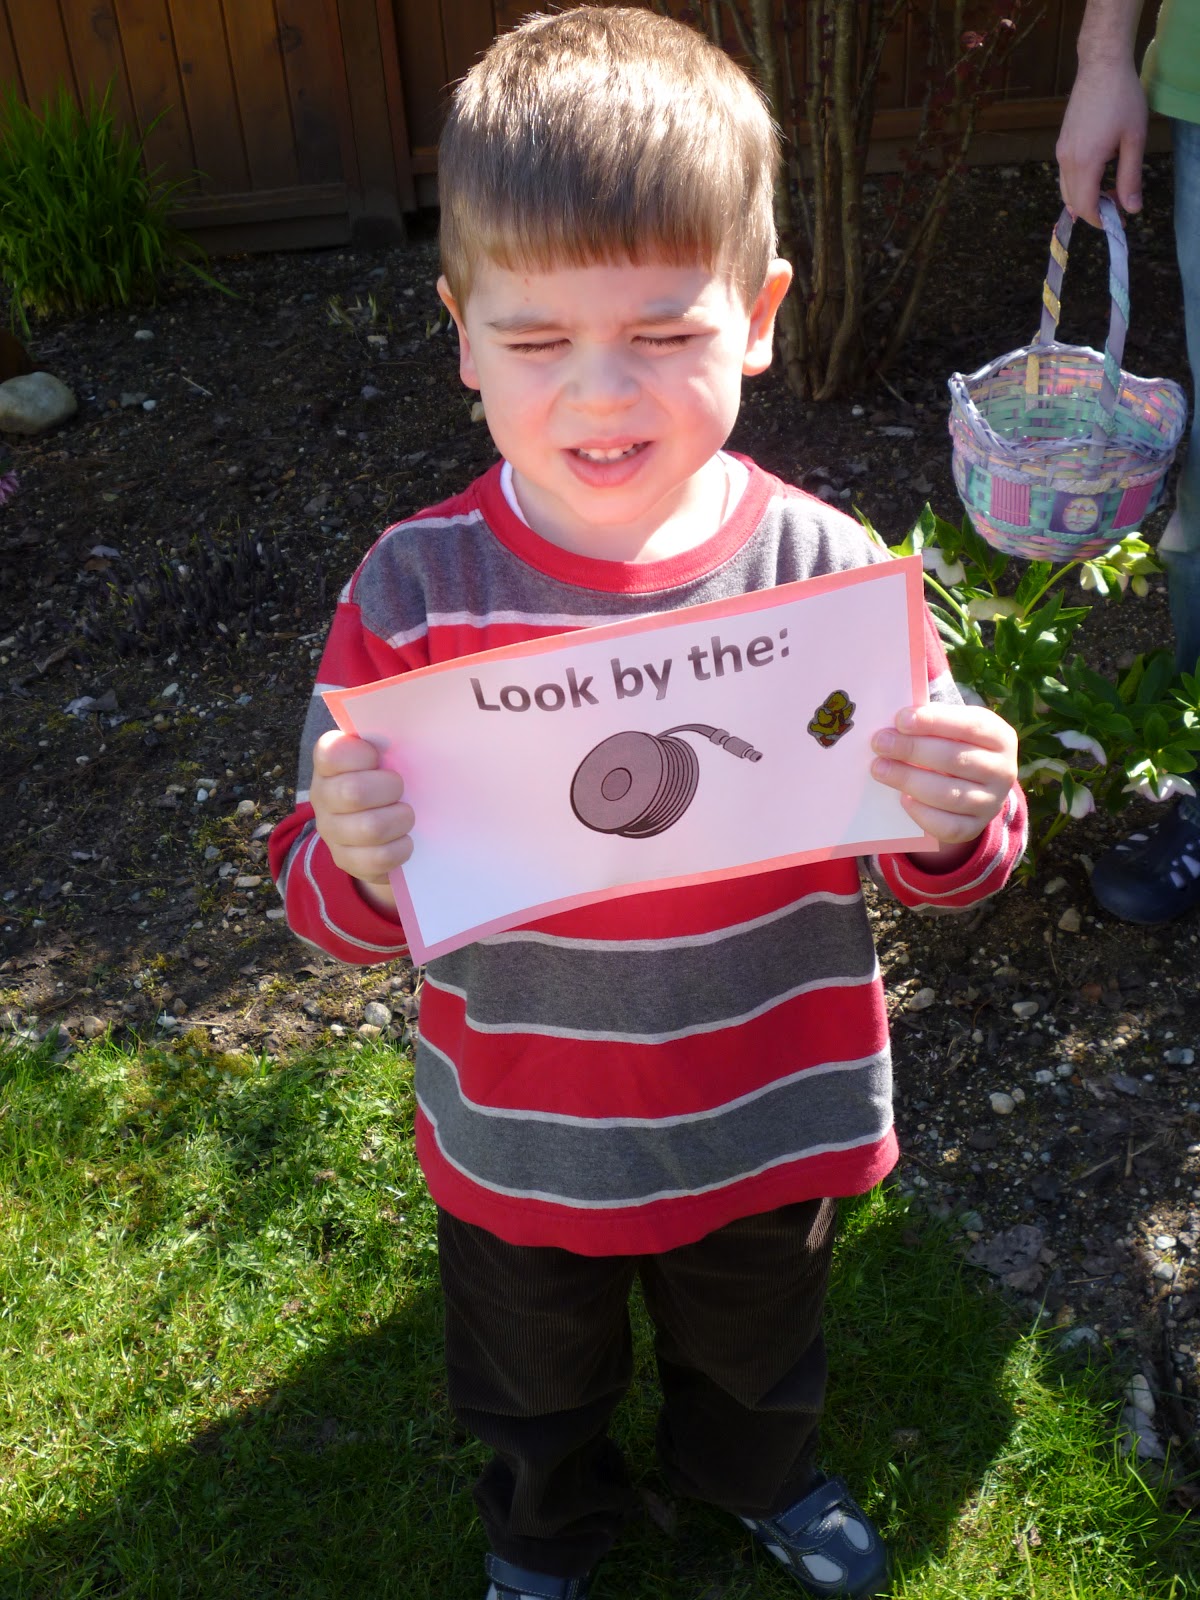
As much as I love Easter, we don't seem to do as much around here to celebrate. However, with the boys getting older and more excitable, we've been slowly changing that. Last year we made the requisite egg hunt a little more fun, scavenger style. This was a quick and easy thing, all done during one nap, ready for them when they awoke. I love spur of the moment things that turn into the best memories. Matteo could read one word, "LOOK". So we used it to its full extent:


This was good fun for all. Matteo was right into the hunt, and Elio happily followed him around, excited too. Until he found chocolate. Then it was over and there he sat unwrapping foil from eggs with his one and a half year old fingers. Observe:

Now Matteo has a few more words under his reading belt, maybe we can expand vocabulary on this year's version. Although, I'm not sure where I'll find a log, frog, bog, dog, cat, rat or Pat to hide things around. The trouble with phonix. Here's what last year's clues looked like: 
This year I think I will re-work the mac-tac shamrock craft I loved so much to make Easter egg sun catchers with the boys. Of course there will be the again requisite dying of eggs. This gets boring, but they love it. I like to dye eggs too, but am always on the hunt for different things to do with them. And that good old Martha Stewart never disappoints. A few years ago I found her silk tie dying technique and really thought it was cool. I'll give you the Reader's Digest version: Take an old silk (100%) neck tie, cut it apart so that you have squares of silk. Wrap each egg in silk, securing with an elastic, and dip in boiling water. Here's the result: 

Another of her awesome tips is to shine the dyed eggs up with some olive oil. This project had me hunting down thrift store special ties for weeks. I loved it. I know she's a felon, but geez... is there nothing she can't do??! For full instructions check it out: http://www.marthastewart.com/245379/silk-tie-easter-eggs

Next week Matteo has a party at preschool for Easter. Such fun. And it forces me to bake. I decided after years of drooling over flooded cookies, that I shall try. Today in fact. Bear in mind I have zero patience when it comes to baking. Stay tuned. Could be a disaster. I'll blog about it.

What are you all up to for Easter? Anything fun? 

Happy trails!

PS: Lisa had her baby last night- Happy birthday to baby Monica Elizabeth!!


Thursday, 29 March 2012

Woah baby!

I love making things for babies. Lucky for me, three of my friends have buns in the oven- that satisfies my uncontrollable need to craft for a while.

First up is my good friend Lisa. Lisa is having a little girl. I should say, another little girl. Yep, Lisa, come the end of March will be the proud mum of 3 little girls (all under 3). I know right?.... all under 3!!!! She's a saint. And a diaper changing machine. Not to mention, a wonderful, fun and patient mum. I have so much admiration for her work ethic and skills, it's remarkable really. She's so patient. I really admire that, because, patience is something in diametrical opposition to my personality.

Now as you can well imagine, Lisa has very little need for your typical baby gifts. I have two boys, 2 and a half years apart, and I'm drowning in mountains of out-grown clothes. I can only presume that as a mum of girls, Lisa also has tons. So I wasn't too keen to do what I usually do when friends are having girls- live vicariously through them by buying and knitting sweet little things that as a mother of boys I cannot indulge in myself.  I controlled that urge when thinking of what to do for Lisa.

See, when I was pregnant with Matteo I was sure I was having a girl. Positive. You have to understand, I'm a very girlie girl. I am not interested in sports, I played Barbies, had lots of dolls, loved to craft, sing etc. When we were in the delivery room, and Matteo made his grand entrance, the doctor told Ethan to tell me what it was "It's a boy!". My response: "Are you sure??". Ethan: "Uh- yeah. Quite sure- that is most definitely a boy". There is more to this conversation that is too crass for mixed company, but suffice it to say, as much as I did, and do, love my son, I was bummed about the shopping end of things. I made sure during my second pregnancy to find out the baby's gender, so as to avoid that same awkward conversation again. And also, I have to admit, we've come a long way from boys clothes of the 1980's that I remember so well: sweat pants, and jammers with hideous cartoon characters all over them. Those still exist for sure, but luckily there are some pretty styling options for boys too now. What was I writing about? Right. Sewing.

Around Matteo's birthday, Lisa had commented on a "Happy Birthday" pennant banner that my mum had made for my kids.

I had first seen these on Etsy, and quickly decided that I could do it myself. Then, I quickly decided that my mum had more time and patience than I do, not to mention skill. I admit it, I pawned the project off on her. And she came through in spades! She showed up to Elio's 1st birthday pattern with the exact banner I had in my head. I love it so much.  Being the sewing rockstar that she is, she even made separate name pennants that we just pin on for the appropriate celebration.


I thought about it and decided that although, kind of a weird gift, this could be a fun thing to receive. At the very least, it wouldn't be anything that she'd get two of. So I went fabric shopping. The banner was actually super easy, completed during the course of two naps and one evening. (Just like I now tell time in Sesame Streets and Batmans, longer durations of work are calculated by naps now.) Here's how this went:

I cut out 26 triangles.

I sewed said triangles together, then turned them right side out and ironed them.


Using double fold bias tape, I sewed the babies together. I left a little space between where the Y of "happy" will go and the B of "birthday". My mum didn't use bias tape. She was making the banner out of a sheet, so she had a nice long stretch of fabric and used that. I didn't want to have to buy yards of fabric for the sake of a long skinny ribbon, in all honesty, I'm far too lazy to piece shorter lengths together for the same result. Bias tape worked nicely, but you are limited in colour choices.
Here's what the thing looked like. If I was smart, I would have sewed the letters on before sewing this sucker together. But sometimes, I'm a couple sandwiches short of the proverbial picnic. It wasn't a big deal, but it was a bit awkward to manoeuvre the whole thing through my machine given its length.


Next, I cut the letters out of felt. The sky is the limit on this. Pick your favourite font. I ended up using 325 pt. font.
Voila.


A close up.
I had lots of fabric left, and since I was making this as a gift, I thought I'd make a little draw string bag for the banner. This way it would store neatly without coming unfolded. I cut 4 rectangles out of the fabric
Next I sewed them up (two together) on three sides. On one of the sewed up pairs I left a three inch opening- I'm pointing to it. I don't have a serger. I would LOVE a serger. But until then, I have to be creative as to how not to have ugly raw edges showing. So I lined this bag (that's why I used 4 rectangles not 2). Are you grasping the extent of my type A personality? I know. It is a bag for a happy birthday banner. No one will see the inside, and it will surface about 5 time a year. The stupidity of this attention to detail is not lost on me. But I can't help myself.


I then turned the bag without the 3 inch opening right side out, and stuffed it inside the bag with the opening, right sides together.

Next I sewed up the top edge (the edge of the bag opening.
I pulled the whole thing right side out through the three inch opening. I hand sewed the opening, and pushed that bag through the bag that didn't have an opening. Wow... could that be any wordier?
Next, using single fold bias tape, I made a casing on the inside of the bag. I braided some cord and threaded it through.
The finished product


I hope that Lisa and her girls enjoy this. It was a fun one to make. I really like this project as there are so many possibilities. How about a name banner to tie on the outside of a crib? I'm thinking of making a banner for the mantel at Christmas time. My mum had a great idea when we chatted on the phone this morning- why not make it double sided- one side with girly fabric, and one side with fabric for a boy- she's very clever. 


Happy trails!

Thursday, 8 March 2012

Eat the rainbow

I'm fairly sure that when they say that, they are not referring to Fruit Loops. That being said, there is a large bag of Fruit Loops on my kitchen counter. But in my defence, they were purchased for crafting purposes. I would be lying however, if I said Elio didn't love them. I would be lying also if I said Ethan didn't love them. Matteo won't touch them with a 10 ft pole. He is undiscriminating in his disdain of any form of fruit- real or loop. Sigh.

But what better material for the second (and likely last) instalment of the St. Patty's day craft series? Fruit loop rainbows it is! This craft was so perfect for Matteo's just-5 capabilities. He did every part of this one, which was very cool. This one offered many opportunities for practicing those fine motor skills, which really aren't his bag. And he felt pretty proud of himself.

 We began by sorting the colours. This would have been a great task for Elio, and his 2 year old abilities. Except for one thing. He kept eating the craft supplies. So we gave him a bowl of his own to eat. "CHEEEEEEEESE!". By the by, the bandaid situation on his face is not as spectacular as it looks.
 Next I drew out a rainbow in pencil on construction paper. I feel the need to vent about how construction paper is not what it once was. it is wimpy in colour, and really flimsy. We had to mount it on scrap booking paper to ensure it would stand up to the saturation of white glue.
Next, a popsicle stick and school glue, and away we went, pasting the fruit loops on the line to make a rainbow. I was amazed when I asked Matteo if he knew what order the rainbow colours went in, and he promptly spouted out "Red, orange, yellow, green, blue, indigo and violet". Apparently Sid the Science Kid does sink in.
 I was also thrilled that we seem to be developing.... an attention span! This is so cool. Matteo lasted the whole length of the craft, and it took him a good half hour. There is light at the end of the tunnel!
 Elio, on the other hand, enjoyed two bowls of dry fruit loops while watching me make a fruit loop rainbow. Once in a while he'd hold the popsicle stick, dip it in glue and drip it across the floor.

We added cotton ball clouds and .... Ta-DAH!!!!! A very proud 5 year old indeed!

Hope you are finding fun things to keep you busy.

Happy trails!

Tuesday, 6 March 2012

I wish I were Irish...

Well, not really. But kind of- I like potatoes, my favourite colour is green, I love Celtic music, and who doesn't want to Billy Elliot or Riverdance?! Plus, the accent is adorable.

So it is no surprise that St. Patrick's day is a holiday I can really get behind. As soon as March rolls around, my classroom is decked out with leprechauns and shamrocks and pots of gold- not to mention cheesy, stereotypical sayings like "Top O' the Mornin' To You!". It's such fun, and the kids love it. I remember adds for McDonald's Shamrock Shakes on TV. The town I grew up in didn't have a McDonald's so I was pretty disappointed in university when I discovered that Shamrock Shakes are, indeed, disgusting. It was in university that I also discovered green beer is not as delectable as it sounds. But still- green and fun nonetheless.

Turns out the apple doesn't fall too far from the tree. Matteo loves the Cheiftans. He regularly requests "Irish drinkin' songs" in the car. His favourite song is Whiskey in the Jar. The kid could sing it at 2 and a half. In fact, one day, at church, he sat leafing through the hymnal, when he exclaimed with glee and reckless abandon, "Mum!!! I found Whiskey in the Jar!!" Another proud moment for the Shoemakers. Apparently the old Glory and Praise has come a long way. I will most certainly have explaining to do when he arrives in Kindergarten in September. (He also knows all the words to the Mermaid song by Great Big Sea- if you don't know that one, look it up it is a gooder). And the parent of the year award goes to... Sigh. Parenting at its finest indeed.

I happened upon this website which has great ideas for crafts to do with kids:
http://www.allkidsnetwork.com/

There is quite an array of thematic craft and activity ideas for any season. I was thrilled to find a couple with very appropriate preschool skills involved. Tonight we had fun, and remarkable success with their Tissue Paper Stained Glass Shamrock Craft (http://www.allkidsnetwork.com/crafts/st-patricks-day/tissue-paper-shamrock.asp). I got really excited when I saw it because yes, I have a major love for Mac Tac. You know, Mac Tac- clear contact paper? I discovered this when I was running the summer reading program at my local library. Seriously, best summer job ever. We did day camps more or less, for children ages 4-10 all summer long- read books, played games, did crafts. Super fun. I had a couple awesome partners in crime, but it was my buddy Stephanie and I that mac-tacked EVERYTHING. And I wish I were joking. If it stood still long enough, it was covered in mac-tac. Turns out true love lasts a life time. I still love mac-tac. So this craft was good fun. Plus it was neat and tidy. Check out the link- but here's the Reader's Digest Version:
1) Don your best leprechaun attire (because to craft in anything else would just be silly).


2) Cut out the outline of a shamrock from construction or scrap-booking paper (do two at once as you need frames for both sides)


3) Cut out squares of green and yellow tissue paper (this was a good one for practicing scissor skills- kept Matteo busy and quiet for a while).

4) Cut out a piece of contact paper large enough to cover the shamrock with a border around it. Smooth one of the shamrock outlines on it flat.

5) Place the tissue paper squares on in over-lapping way- try keep it smooth. Or, if you are 2 years old, by all means grab handfuls of the squares and throw them in the air and all over the floor for your mum to clean while yelling "Fly!!!"


6) Once you're covered, glue the second outline on top of the first to finish the thing. Then place it on a second piece of contact paper to kind of laminate the thing. And cut out!

We did this in the evening, so taking pics of the final product wasn't really possible. At any rate, the kids thought they looked really cool when held up in the light. Easy peasey lemon squeezy... and they actually look good!

Let it be said, I won't get into politics, but if you are a teacher in BC, please know that you are supported. Doing one measly craft with two wee children is enough to make me go bonkers, so those of you faced with classrooms full of the darlings, many with special needs and behavioural issues have my respect and full support. Mush on!!
Happy Trails!